You’ve bought yourself a fancy, new, seamless pattern. Woohoo! ….umm…..now what?
(What?!? You don’t have yours yet?? Get your own here or here or here!)
In any graphics program, you can simply copy and paste the images beside each other. They will match up at the edges perfectly and you won’t have any overlap. Easy peasy. (This will work in Photoshop or Elements or Inkscape or Illustrator or even Paint!)
If you have Photoshop (or Inkscape – the process is similar), there’s a nifty little trick that can help you make magic 🙂
Define Pattern
If you open up the seamless pattern, and then go to Edit and Define Pattern… and then give it a name.

This means that Photoshop will recognize this as a pattern and can tile it for you, with a few extra tricks.
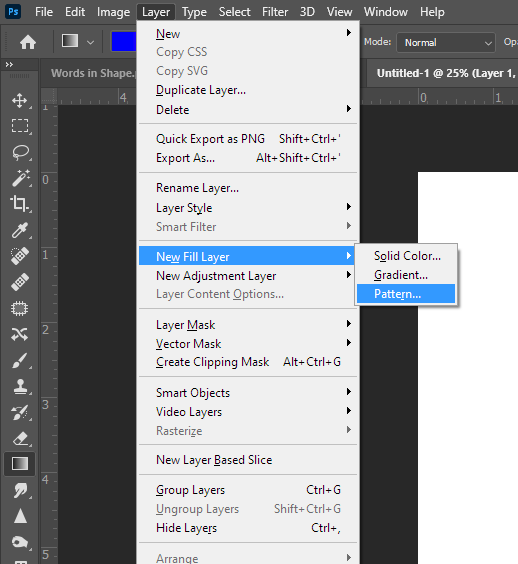
Create Pattern Layer
To use your pattern, you can create a Pattern layer, using Layer -> New Fill Layer -> Pattern
Give it a name, and then you will see the pattern options. Clicking on the box or drop down that shows the small image will give you the list of patterns. Your new pattern should be in here! You can also adjust the scale which will increase or decrease the size, and the angle, which can rotate your pattern.

Because you created a pattern fill layer, it will automatically include a mask layer… If you know how to use it, go for it. Otherwise, that’s a lesson for YouTube or another time! 🙂 If you rasterize this layer, you can treat it just like any other layer.
Fill with Pattern
If you create shapes in Photoshop (or Inkscape), you can fill them with a pattern. After creating the shape, select the Fill option, and select the Pattern option. Then, your list of patterns will show up and you can select your new pattern!


Taadaa!
That’s all for now! Hope this gets you started in your adventure!